System restore is very important feature that Windows offers. It can be used to recover your entire hard drive back to a previous state. If any information gets corrupted, you can usually use this tool to go back in your computer’s timeline and start from there. This tutorial will show you how to enable system restore as well as show you how to access them if your data becomes compromised.
NOTE: This tutorial is for the Windows 7 operating system. Some of the steps found in this tutorial can be used in Windows 10 as well.
Lets get started!
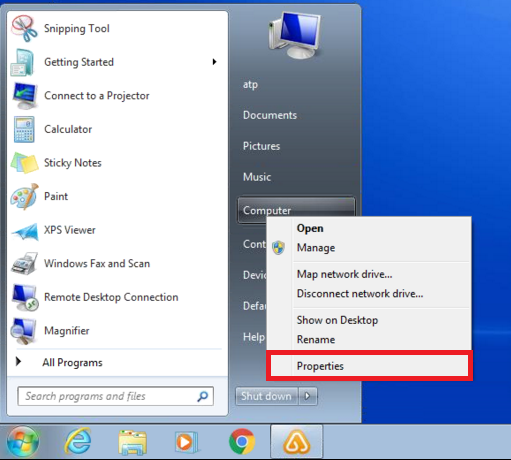
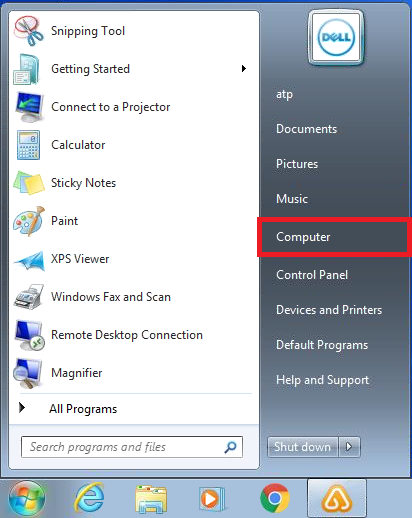
Click on the Start Menu icon on the bottom left of the task bar. (It should look like a circle with the Windows logo inside of it.)

Find the “Computer” option and right-click it. Then move down and left-click “properties.”

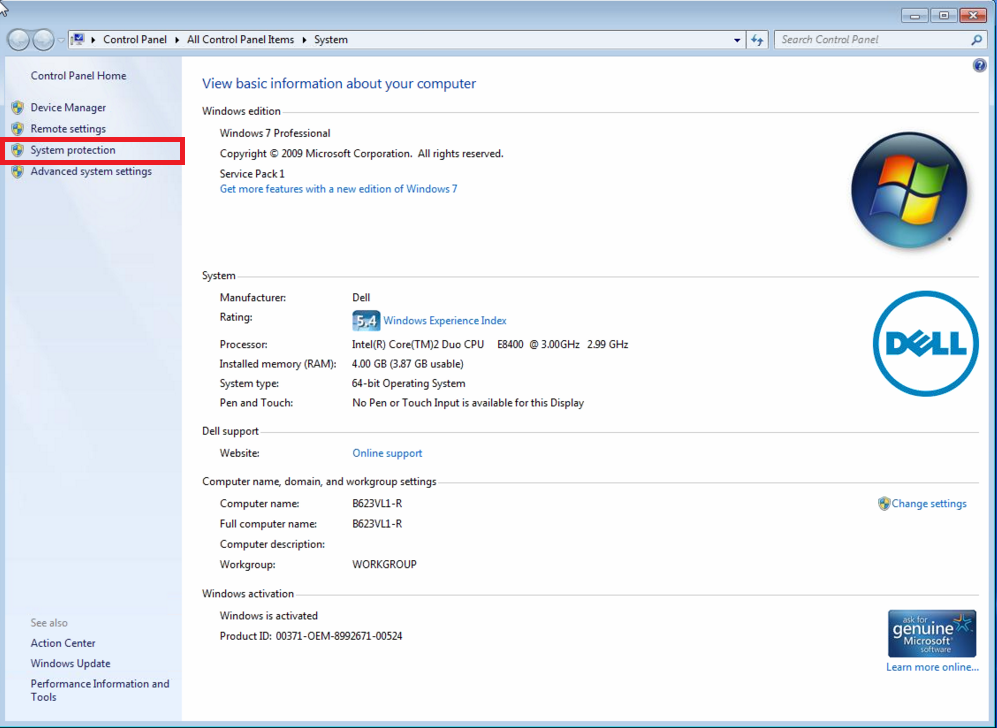
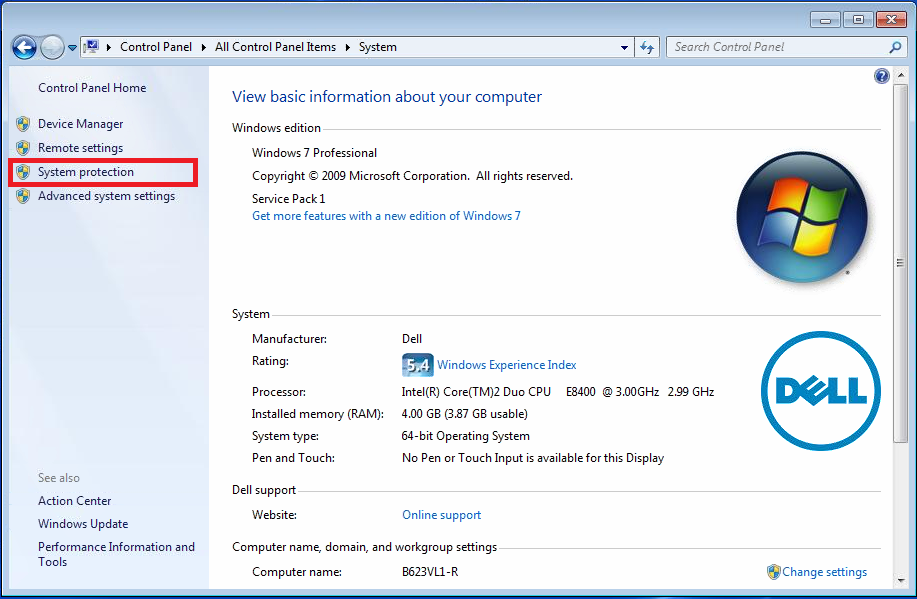
Once you get to the “System” window, click on “System Protection” near the top left of the window.
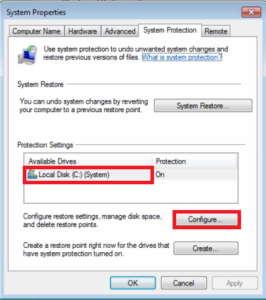
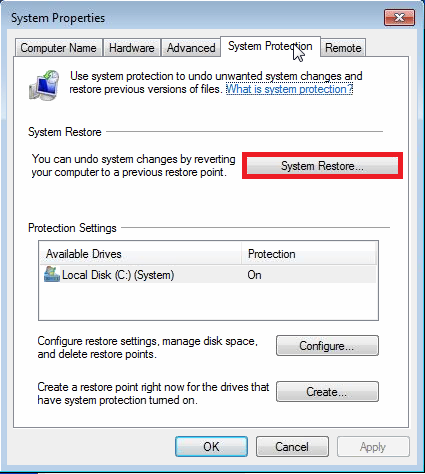
After opening the “System Protection” tab, select the correct hard drive and then click on the “Configure” option near the bottom right of the window.
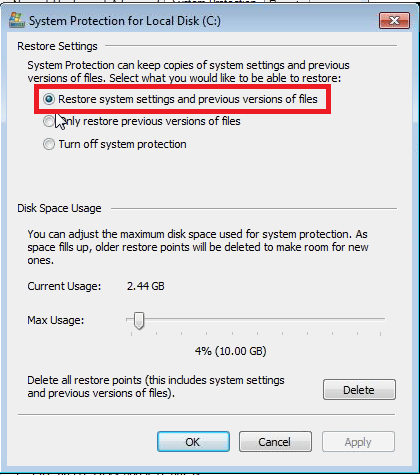
In the System protection for your selected hard drive, select the option, “Restore system settings and previous versions of files.” This will allow system restore to start creating a restore point. Once you are finished with this setting, left-click “OK.”
NOTE: If you have “Only restore previous versions of files” selected then you will not be able to use system restore.
Once you enable “System Restore,” your computer will start creating restore points for your operating system.
Now that we have enabled system restore, we can now use the restore points if we need to. These next steps will show you how to use your newly created restore point.
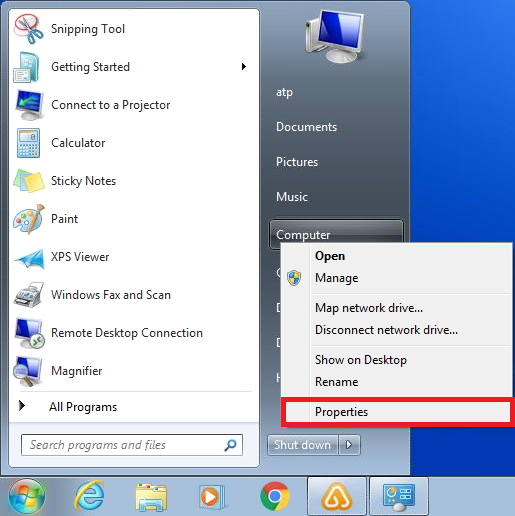
Click on the Start Menu icon again on the bottom left of the task bar. (It should look like a circle with the WINDOWS logo inside of it.)
After you click start, right-click on “Computer” option. Then left-click “Properties.
Once you have made it to the “System” menu, left-click the “System Protection” option.
In the “System Properties” menu, left-click the “System Restore” near the middle-right of the menu.
 .
.
The System restore menu should appear, click “Next” to continue.
Select which restore point you wish to use and then left-click “Next.”
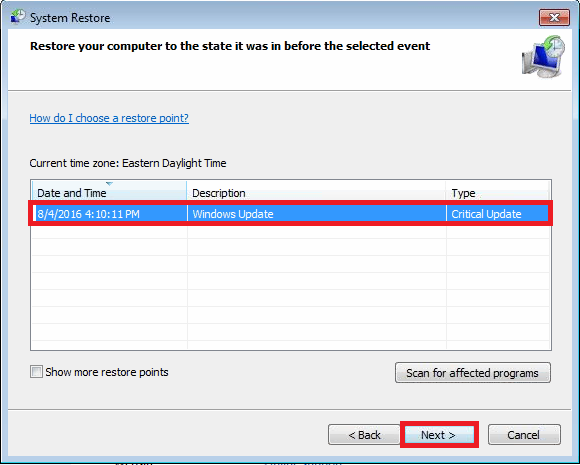
Once you click “Next,” another page will appear that describes everything that is going to happen. In this example it shows you that the system will be restored to a point when a critical windows update occurred. If you are satisfied with the information on this page, left-click “Finish” on the bottom-right of the page. This will allow your computer to start the system restore.

If done successfully, your computer will be reverted back before the action listed was performed!