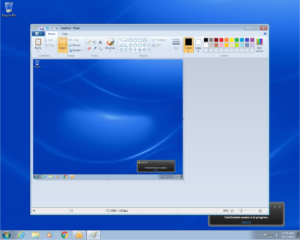
Snipping Tool and Print Screen are very helpful tools that allow you to capture screenshots or selective pieces of information you may want to hold onto. These functions are also helpful for capturing errors that may pop up as well. This tutorial will show you how to properly use, save, and edit these screenshots.
NOTE: Newer versions of Windows have extra functions and options (i.e. Delayed Snip.) This tutorial will show you how to use Snipping Tool on the Windows 7 operating system.
Let’s get started!
Part 1: Snipping Tool
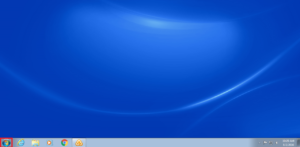
Click on the Start Menu icon on the bottom left of the task bar. (It should look like a circle with the Windows logo inside of it.)
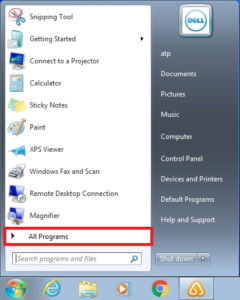
Click on the “All Programs” option near the bottom of the start menu.
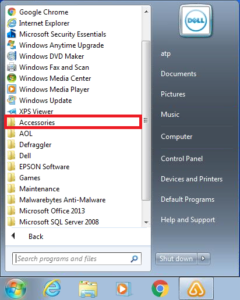
Once all programs are being displayed, left-click the “Accessories” folder.
In the “Accessories” folder, left-click on the “Snipping Tool” program.
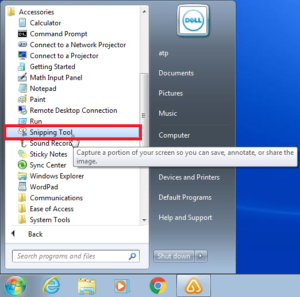
Once the Snipping Tool is open, you may choose between a few options when making a new screenshot or “snip.” Those options are:
You may also change certain settings such as:
NOTE: To choose between the different snipping options, left-click the arrow that is attached to the “New” option. (For this tutorial, we will be using the “Rectangular snip” option.)
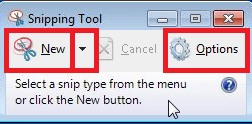
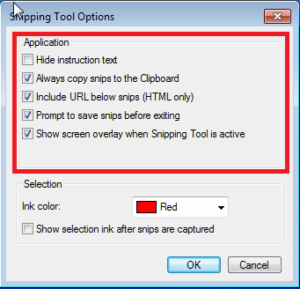
Once you have what you want to snip on your screen, left-click the “New” option. The screen will have a light overlay and you will be able to left-click and drag your mouse to highlight the section (or all of) the screen that you want to snip. Once you let go of the left-click, the selection will appear attached to your snipping tool program and you will be able to save it by left-clicking “file” > “Save As.” Alternatively, you are also able to click on the floppy disk icon, this method also saves your documents.
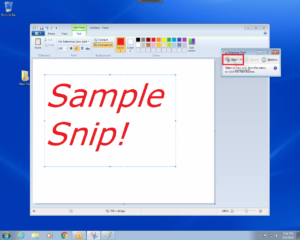
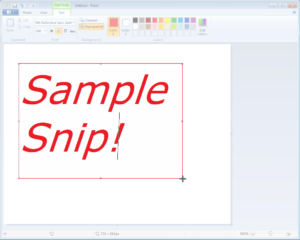
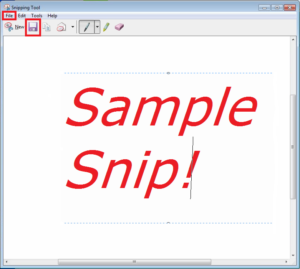
After you save your snip, you can do anything that you could do with any other picture saved on your computer.
Part 2: Print Screen
Print screen is another option for capturing screenshots, it is a little less interactive and most of the times you will not see it in action, but it is a very reliable way to capture what is on your screen at that very moment without needing to go into a program.
NOTE: In this tutorial, we will be using the Microsoft Paint program.
Let’s get started!
With anything you want to capture on screen, all you need to do is use the keyboard shortcut, “Print Screen” or “PrtSc.”

There are a couple different ways to print screen as well. For example, if you have multiple monitors, you can click on the monitor you want to capture and then press “Alt + Print Screen” instead of it capturing the monitor that is chosen as your main monitor.

Once you have entered your desired print screen command, open up any program you can apply images to, (I personally use Microsoft Paint, Gimp, or Photoshop) and paste them in that program. This will allow you to save your image to a location on your computer to use later.
To Paste, right-click on the program you wish to paste to and left-click the “Paste” option, or you may use the keyboard shortcut, “Ctrl + V.”
